ARI(M1-100K/C) installation guide
페이지 정보

main content
1. Check the standard of the door you want to install the door lock on and determine whether it is compatible.
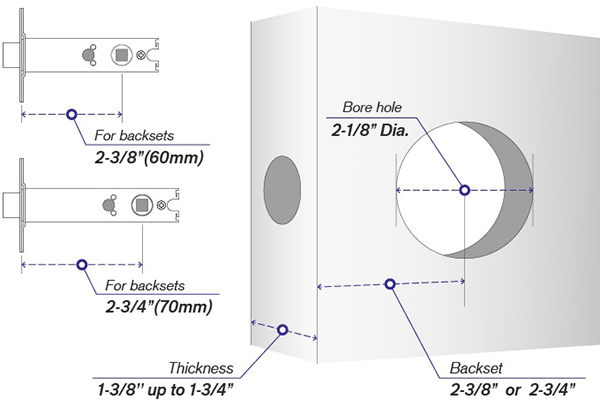
Specification
Door thickness: 1.38"~1.78" (35~45mm)
Back set: 2.36" (60mm)
Bore Hole: 2.1" (52~54mm)
2. Check the product components (parts) and each use location.
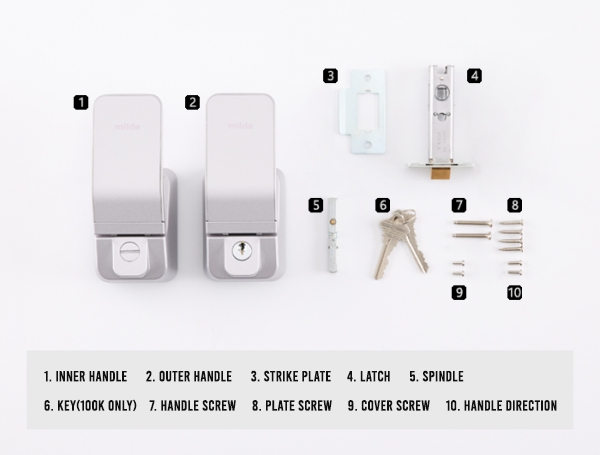
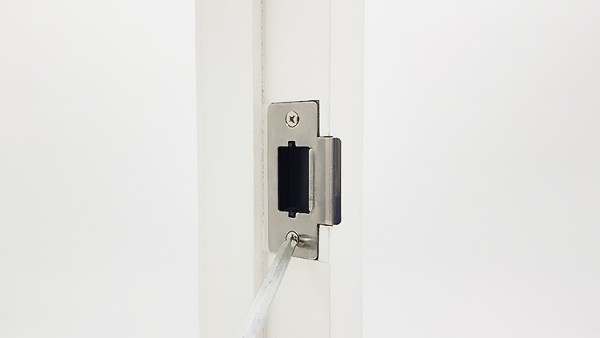
3. Fix the No. 3 door strike to the door frame using the No. 8 screw.
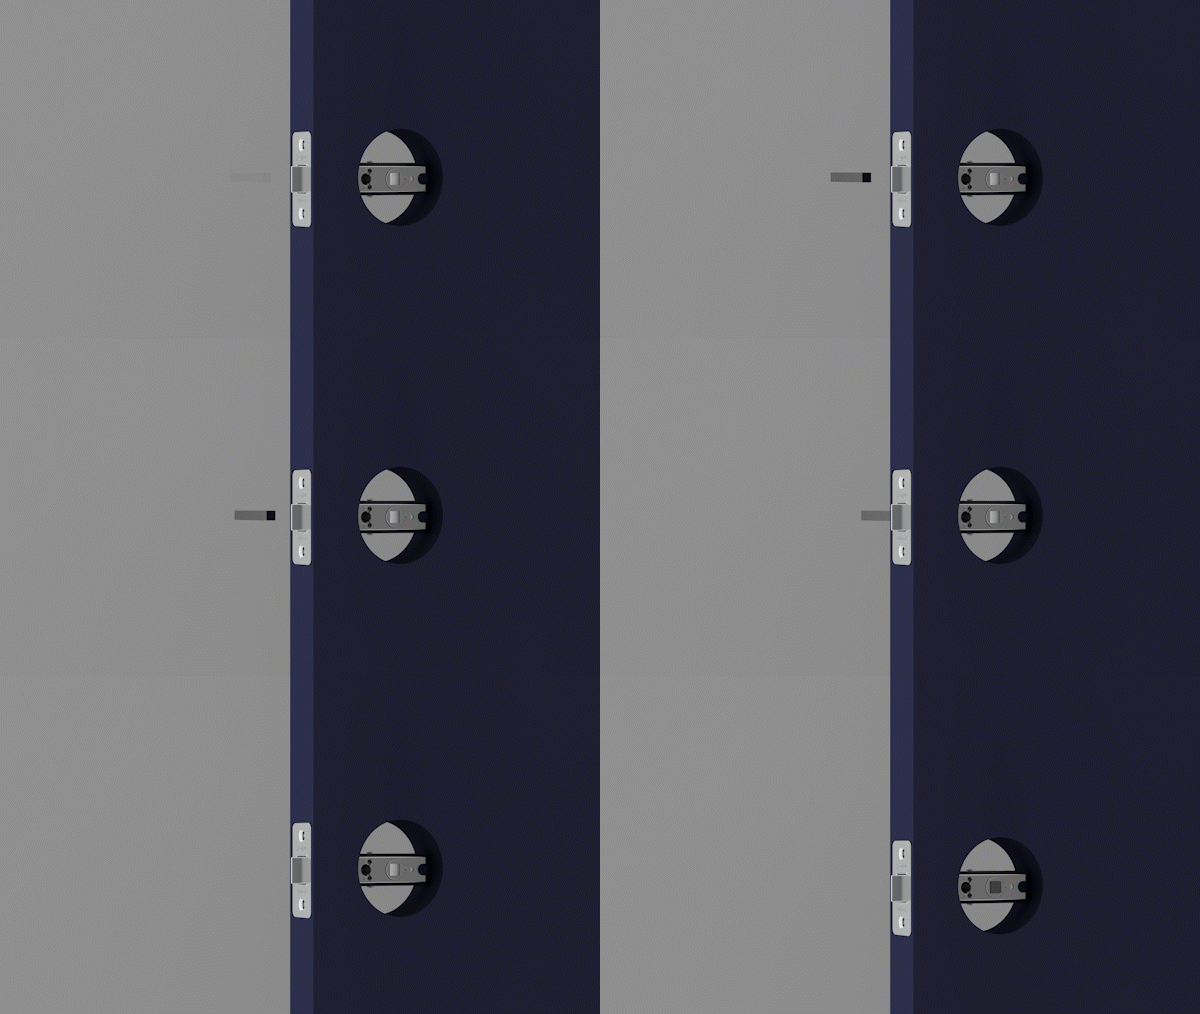
4. Insert latch No. 4 and secure to the door with screw No. 8. (Caution. Make sure the flat side of the latch head faces inward)
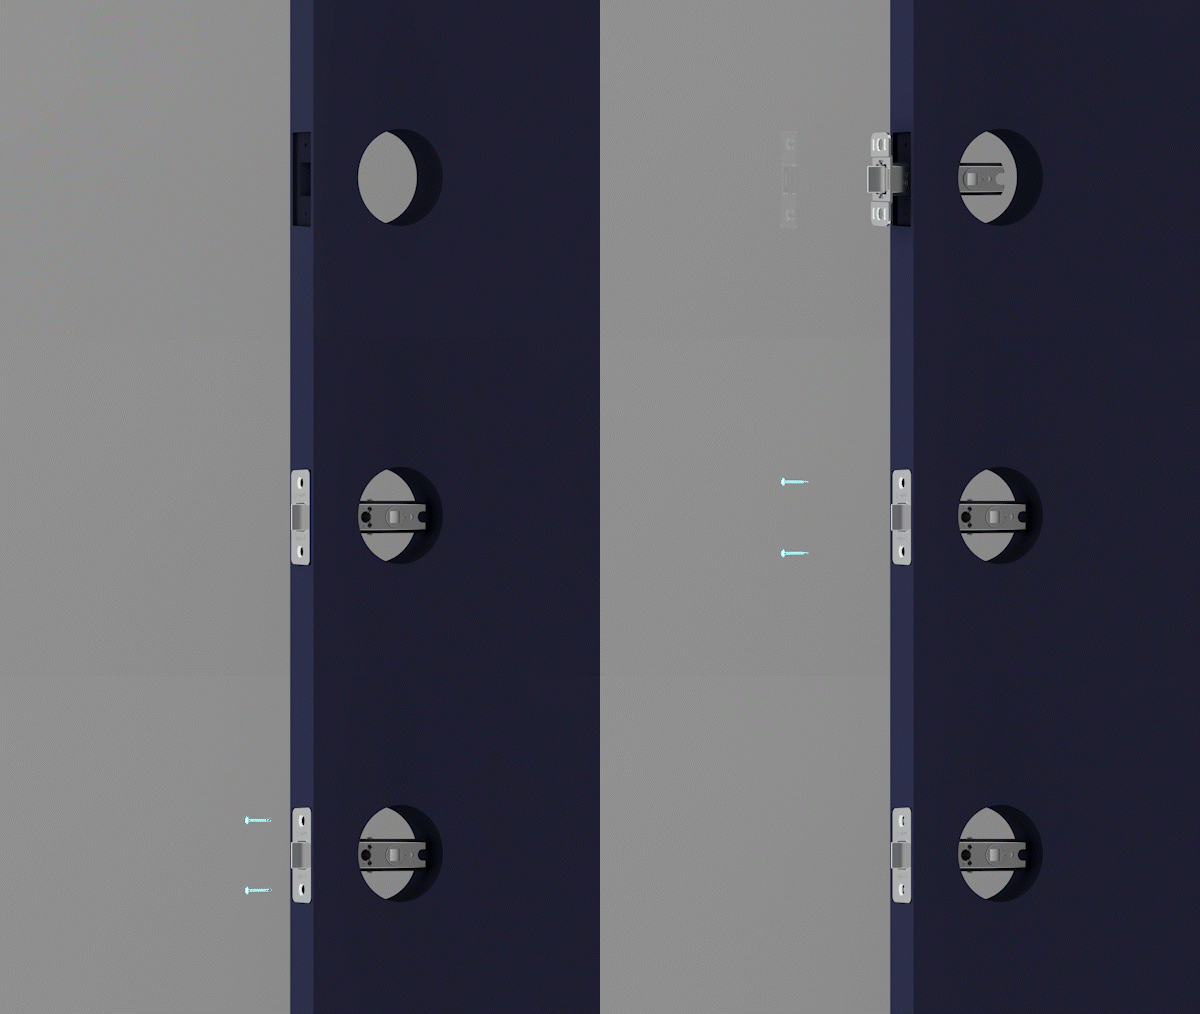
*The left side (gray) of the image is outside the door, and the right side is inside the door
5. Insert spindle No. 5 from the outside of the room toward the inside of the room and secure it to the latch.
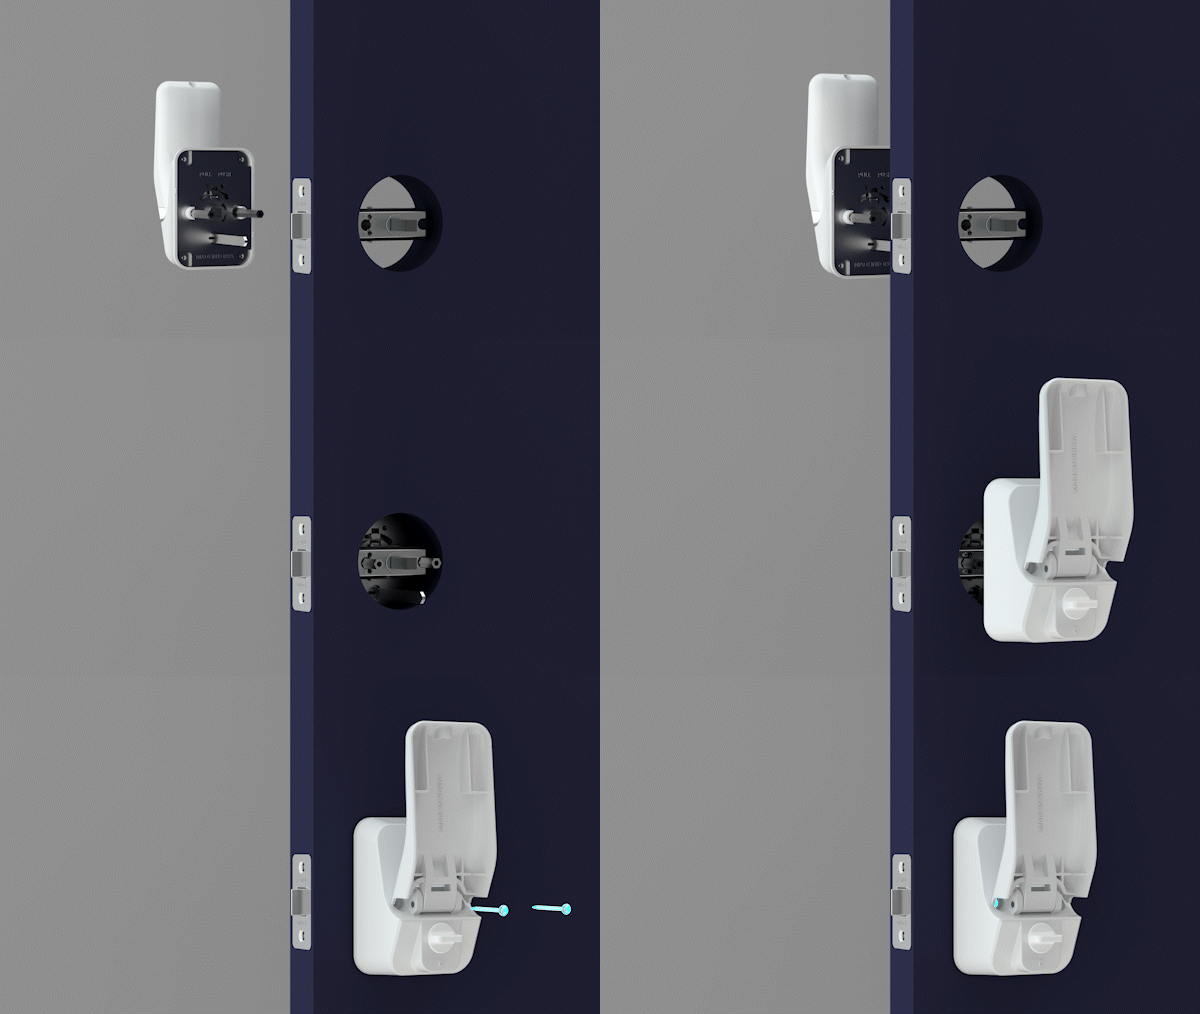
6. After fastening to the latch in the order of the outer handle and the inner handle, fix it using the No.7 screw.
(When fastening the handle, the kit stand should be placed vertically and the knob should be placed horizontally)
7. After completing the installation by covering the cover of the inner handle and fixing the top with screw No. 9,
check that there is no problem in the operation of the handle and latch before closing the door.
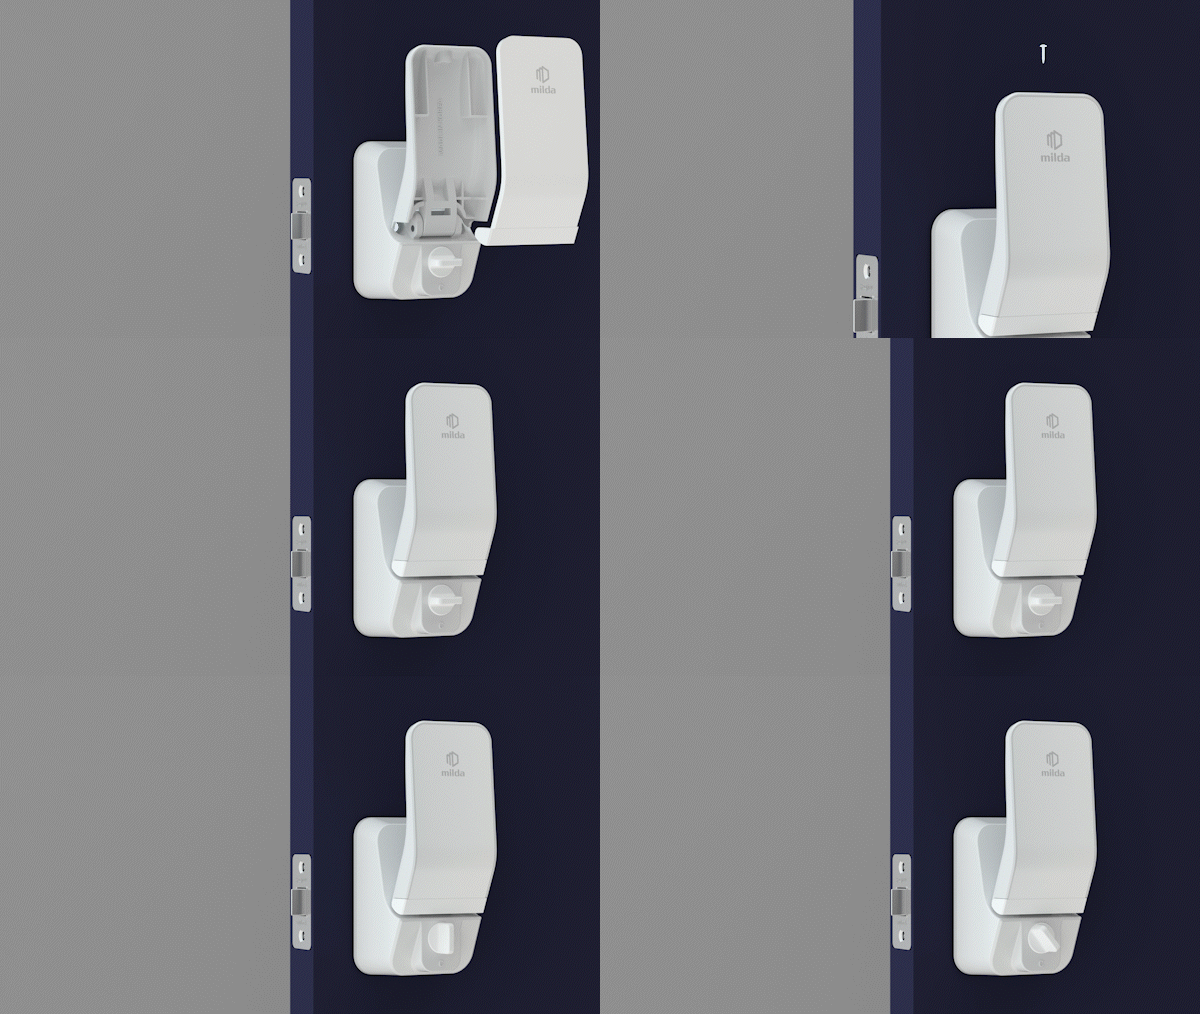
See video 2:20-2:59
Attachments
-
ARI_M1-100KC_en_2023.pdf (3.2M)
2Download | DATE : 2023-09-14 15:31:14
Comment list
There are no registered comments.


